QR Code Printen
Print a QR code at the wrong size and roughly one in three scans will stall before the camera even locks focus, based on the print-failure patterns documented across 2026 sizing guides. If you searched “QR code printen,” the Dutch term for printing a QR code, you’ve probably already lived this: a code that looked perfectly scannable on your screen, then went dead the moment it hit paper.
The QR pattern itself is rarely the problem. It’s almost always resolution, physical size, or a missing white margin. This guide covers exactly how to print a QR code that scans on the first try, from file format and DPI to safe sizes for business cards, posters, and packaging. For how QR codes are built and read in general, see the full QR code guide.
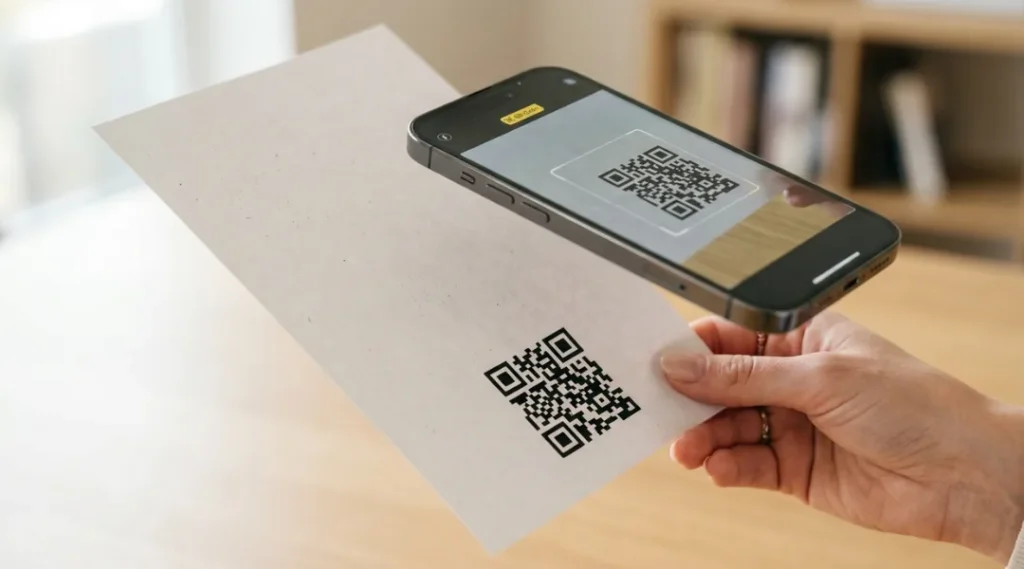
Table of Contents
ToggleWhat Is QR Code Printen (Printing a QR Code)?
QR code printen, printing a QR code, means exporting a QR pattern and reproducing it on a physical surface, paper, plastic, or packaging, so a phone camera can scan it reliably. Unlike an on-screen code, a printed one depends entirely on resolution, ink contrast, and quiet-zone accuracy, since paper can’t self-correct the way a backlit screen can (QR Code KIT).
Why QR Code Printen Matters in 2026
Printing a QR code correctly matters more in 2026 because two separate industry shifts just made vector export and dynamic-code pricing less predictable, and because retail’s move toward denser 2D codes means printed codes now need to survive real handling, not just a clean lab scan.
Two changes worth knowing about. In April 2026, QR Tiger moved SVG export, the format most print shops require for clean scaling, behind its paid Premium plan. In March 2026, Uniqode raised renewal pricing 40 to 60 percent for existing dynamic-code customers, with no grandfathering (both changes tracked in EZQR’s 2026 generator comparison).
The physical math backs this up. A printed module needs roughly four camera pixels to resolve cleanly, which is why a 1.2-inch code printed at 72 DPI can fail while the same size at 300 DPI scans instantly (QR Code Dynamic). Sizing guides converge on the same floor for anything held in the hand: 2 x 2 centimeters minimum, scaling up using a 10:1 ratio of scanning distance to code width for anything viewed from further away (QR Code KIT sizing guide).
A common real-world case: a restaurant shrinks its table-tent QR code to squeeze in a logo, then wonders why half its diners give up and flag down a server for a paper menu instead. None of this matters much for codes that only ever live on a screen, since displays are backlit and far more forgiving of small sizing mistakes than ink on paper.
Most articles about printing a QR code stop at “click download and print it.” They skip the two decisions that actually determine whether the printed code works: which file format to export, and how the physical size interacts with scanning distance.
How QR Code Printen Works: Step-by-Step
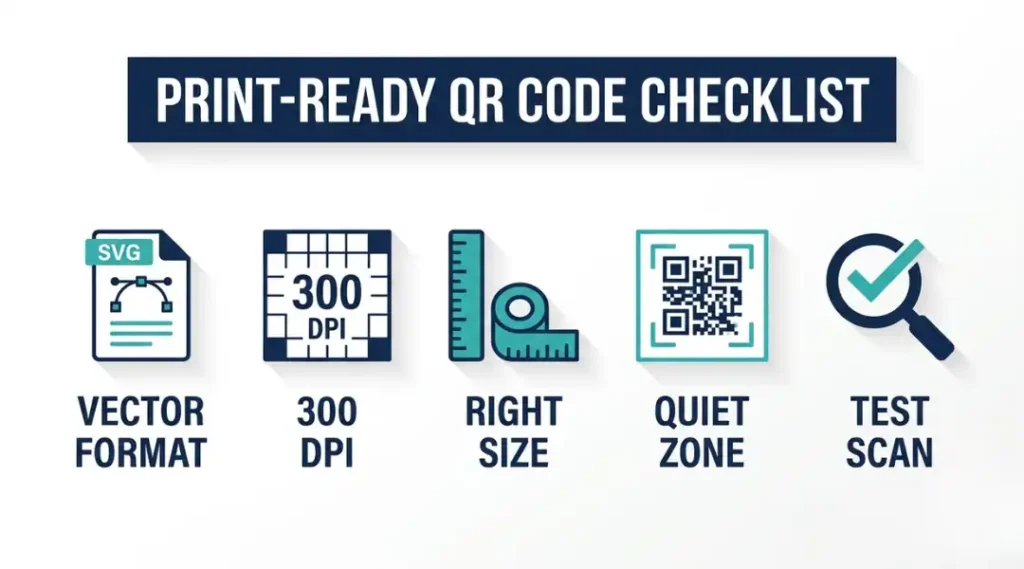
Printing a QR code that scans reliably comes down to five decisions, made in order: pick the right export format, set the resolution, size the code to its scanning distance, protect the quiet zone and contrast, then test the actual printed proof before mass production.
Step 1: Export in a Vector Format, Not a Screen-Res PNG
This locks in sharp edges no matter what size you print at. Choose SVG, EPS, or PDF export instead of PNG. A PNG saved at web resolution for a homepage will pixelate badly once stretched to poster size, since vector files are built from mathematical curves rather than fixed pixels (The QR Code Generator’s format guidance).
Common mistake: downloading whatever PNG the generator shows on-screen instead of hunting for a dedicated vector export button.
Step 2: Set Print Resolution to at Least 300 DPI
This keeps every module sharp enough for a camera to resolve at close range. Export or rasterize at 300 DPI minimum for anything scanned within arm’s reach, business cards, flyers, menus, packaging, and don’t drop below 150 DPI even for posters viewed from a few feet away.
Common mistake: reusing a 72 DPI image pulled straight from a website instead of re-exporting for print.
Step 3: Size the Code to Its Real Scanning Distance
This prevents a code that scans fine at your desk from failing across a room. Apply the 10:1 rule: divide the expected scanning distance by 10 to get the minimum code width, with a 2 x 2 cm floor for anything held in the hand.
Common mistake: using the same code size for a business card and a storefront window, when the two have wildly different scanning distances.
Step 4: Protect the Quiet Zone and Contrast
This gives the scanner a clean, unambiguous boundary to detect. Keep at least four modules of blank margin on every side, the minimum required under ISO/IEC 18004, and keep dark modules on a light background rather than inverting the colors.
Common mistake: cropping the white margin tighter to fit a logo, tagline, or decorative border closer to the code.
Step 5: Print a Physical Proof and Test It
This catches paper-specific failures a screen preview simply can’t show you, ink spread, glare from glossy stock, curvature on a bottle. Print one copy at final size and material, then scan it with at least two different phones under normal lighting before sending the full run to print.
Common mistake: approving a design based on how it looks zoomed in on a laptop, not at the size it will actually be printed.
Best Tools for QR Code Printen
For a single QR code you need to print once, QRCode Monkey is the fastest free route to a clean vector file. For ongoing campaigns where the destination might change, a paid dynamic-code platform earns its monthly cost through editability and analytics. Pick your tool based on three criteria: whether it offers true vector export (SVG/EPS/PDF, not just PNG), whether that export stays free after the platform’s next pricing update, and whether you actually need destination editing after the code is printed.
One dimension most comparison articles skip: free-tier vector export doesn’t always survive a platform’s next pricing update. That single detail is exactly what changed for two of the tools below in the past few months.
| Tool / Product | Best For | Key Strength | Real Limitation | Price (2026) | Verdict |
|---|---|---|---|---|---|
| QRCode Monkey | One-off static print jobs | Unlimited free SVG, EPS, PDF, PNG exports, no account required | No dynamic codes or scan tracking on the free tier | Free (static) | Best free option for print-only use |
| Adobe Express | Teams already designing in Adobe | QR generator built into the same design canvas as your layout | Vector (SVG) export requires the paid plan; free tier is PNG only | [CONFIRM PRICE — paid plan for vector export] | Convenient only if already on Adobe |
| Canva | Quick codes inside an existing Canva design | No extra software needed if the flyer or card is already built in Canva | Static only; limited export formats; can’t edit the destination later | Free (limited) | Fine for simple, permanent codes |
| Uniqode (formerly Beaconstac) | Enterprise campaigns needing analytics | Dynamic codes, SOC 2 compliance, detailed scan analytics | Renewal pricing rose 40-60% in March 2026 with no grandfathering | [CONFIRM PRICE — check current tier] | Best for teams, not solo print jobs |
| QR Tiger | Bulk dynamic-code campaigns | Bulk generation and multi-location campaign management | SVG export moved behind the paid Premium plan in April 2026 | [CONFIRM PRICE — Premium tier for SVG] | Only worth it once you need SVG at scale |
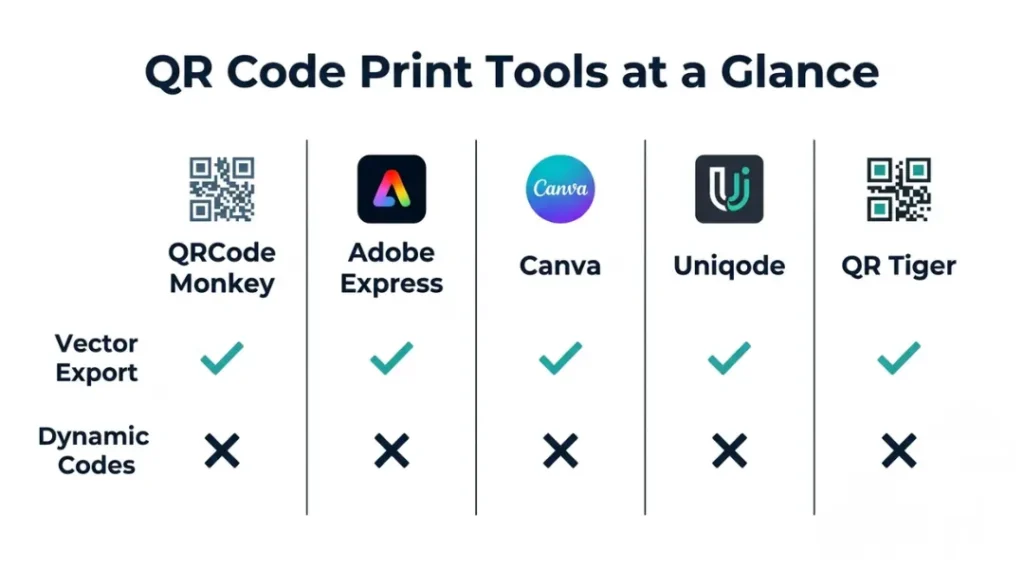
QRCode Monkey remains the simplest path when you just need to print one clean QR code. It exports unlimited static codes in SVG, EPS, PDF, and PNG with no sign-up, which covers most business-card and flyer jobs outright. The real limitation shows up the moment a destination needs to change: there’s no dynamic option on the free tier, so a corrected URL means reprinting the whole run.
Adobe Express makes sense only if your print materials are already being designed in Adobe’s ecosystem, since the QR generator sits inside the same canvas as your layout. The catch is that its free tier only produces PNG; getting a true scalable vector file for large-format print requires the paid plan, which erases some of the “free tool” appeal for anyone printing at poster size.
Uniqode is the stronger choice for teams that need scan analytics and destination editing across many printed materials at once, and its enterprise compliance features are genuinely useful for larger operations. The trade-off buyers should know about going in: 2026 brought a steep renewal price increase with no grandfathering, so budget for the current published rate, not last year’s quote.
Common QR Code Printen Mistakes And How to Fix Them
Mistake 1: Downloading a Screen-Resolution PNG
People do this because the on-screen download button is the obvious default, and it looks identical to the vector file at thumbnail size.
The fix is checking for a dedicated print or vector export option (SVG, EPS, or PDF) before your file ever reaches a print shop.
Self-check: zoom the exported file to 400% on-screen; if the edges blur or pixelate, it wasn’t a vector export.
Mistake 2: Cropping the Quiet Zone to Fit a Logo
Designers do this to save space or tuck the code neatly next to other elements.
The fix is treating the four-module margin as non-negotiable, and if space is genuinely tight, shrinking the whole layout rather than the code’s white border.
Self-check: measure the blank margin against four times the width of a single module; if it’s smaller, it fails the ISO minimum.
Mistake 3: Printing a Static Code for Content That Will Change
This happens when a static code feels simpler to set up, and it is, right up until the linked promotion, menu, or page moves.
The fix is choosing dynamic from the start for anything tied to a campaign, price, or seasonal offer.
Self-check: ask whether the destination could plausibly change within the print run’s shelf life; if yes, it needed to be dynamic.
Mistake 4: Skipping the Physical Test Print
Teams skip this under deadline pressure, trusting the on-screen preview instead.
The fix is always printing one physical proof at true size and material, then scanning it with two or more phones before authorizing the full run.
Self-check: did anyone actually scan the printed proof, not the digital file, before it went to production?
Quick win: before your next print run, run the four-module quiet-zone check and the on-screen zoom test above; both take under two minutes and catch the two most common failure causes. A real example of the cost of skipping this: a boutique retailer once printed QR codes directly onto product tags with decorative elements placed within two modules of the code’s edge, and only a small share of customers could successfully scan them before the batch was reprinted.
QR Code Printen: Frequently Asked Questions
SVG, EPS, or PDF are the best formats for printing a QR code because they're vector-based and scale to any size without losing sharpness. Use PNG only for digital, on-screen use, and always export it at the highest resolution the generator offers, ideally 300 DPI or higher.
The working floor is 2 x 2 centimeters (about 0.8 inches) for close-range scanning, such as business cards or table tents. For anything scanned from further away, apply the 10:1 rule: divide the scanning distance by 10 to get the minimum code width.
Yes, as long as you keep strong contrast between the code and its background, with dark modules on a light background. Low-contrast combinations, or inverting to light modules on a dark background, make many scanners fail even when the pattern itself is undamaged.
The most common causes are a missing or cropped quiet zone, insufficient contrast, printing the code too small for its viewing distance, or exporting from a low-resolution PNG instead of a vector file. Testing the actual printed proof, not just the on-screen design, catches nearly all of these before mass printing.
No. A standard inkjet or laser printer, or any commercial print shop, can print a QR code as long as the source file is high-resolution or vector and the printer's output resolution stays at 300 DPI or above for close-range materials.
Conclusion
Printing a QR code that works isn’t about the code itself, it’s about five decisions made before it ever reaches a printer: vector format, resolution, size against scanning distance, an intact quiet zone, and a physical test print. Skip any one of them and a perfectly valid QR code can still fail to scan once it’s on paper.
Key takeaways:
- Export in SVG, EPS, or PDF, never a low-resolution PNG, for anything going to print.
- Print at 300 DPI minimum for close-range materials, and never below 150 DPI even for posters.
- Size using the 2 x 2 cm floor and the 10:1 scanning-distance rule.
- Keep a four-module quiet zone and strong contrast on every printed code.
- Always test a physical proof with two or more phones before the full print run.
In the next 10 minutes: open your current QR code file, zoom to 400% to check it’s a true vector export, and measure its quiet zone against the four-module rule. If either check fails, fix it before you print another copy.