How to Check SSD Health on Windows and Mac
Your SSD may be working perfectly today, but that does not necessarily mean it will stay healthy indefinitely. SSDs have a limited write endurance, and problems can develop before you notice obvious symptoms such as slow file transfers, freezing, boot errors, or missing files.
The good news is that you do not need to open your laptop or remove the SSD to monitor its condition. Windows, macOS, and third-party diagnostic tools can provide useful information about drive health, SMART status, temperature, capacity, and other indicators.
If you are wondering how to check SSD health, this guide explains the easiest methods for Windows and Mac users, what the results actually mean, and when you should consider backing up or replacing the drive.
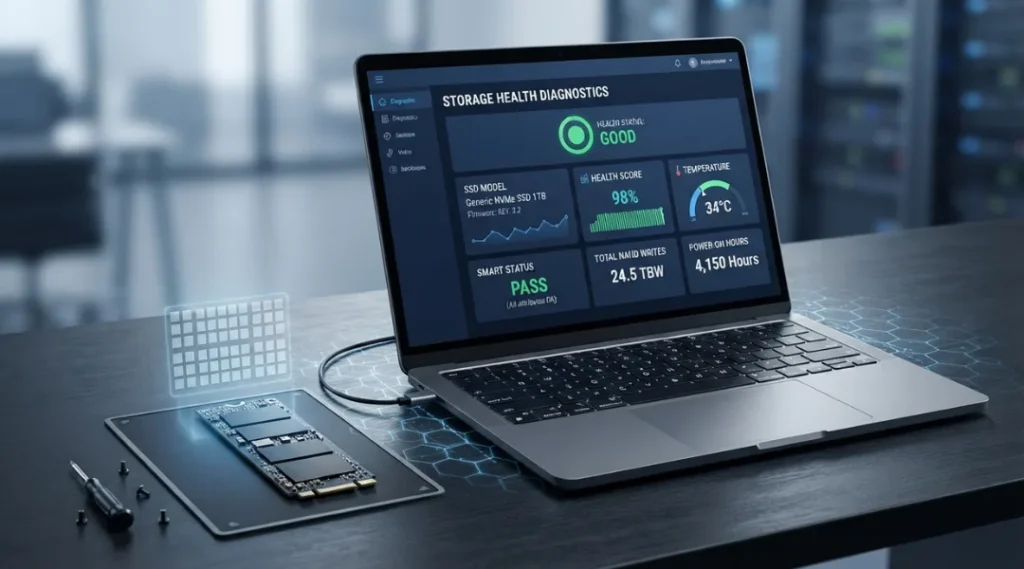
Table of Contents
ToggleWhat Does SSD Health Mean?
SSD health describes the overall condition of a solid-state drive based on information reported by the drive and the operating system.
Unlike an old-fashioned hard drive, an SSD has no spinning platters or moving read/write heads. It stores data in NAND flash memory. Every time data is written and erased, the flash cells experience some wear.
Modern SSD controllers use technologies such as wear leveling and spare blocks to distribute writes and extend the drive’s useful life. However, wear still increases over time.
When checking an SSD, you may encounter information such as:
- Health status
- Percentage used
- Estimated remaining life
- Total host writes
- Drive temperature
- SMART status
- Available spare capacity
- Media or data integrity errors
- Critical warnings
One important point is that SSD health is not the same as available storage space. An SSD with 500 GB of free space can still have a health warning, while an almost-full SSD may still report healthy hardware.
How to Check SSD Health on Windows
Windows provides several ways to inspect storage health. The easiest method depends on the type of information you need.
Method 1: Check SSD Health Using Windows Settings
Some modern Windows systems expose drive health information through Windows Settings.
- Press Windows + I to open Settings.
- Select System.
- Select Storage.
- Look for Advanced storage settings.
- Open Disks & volumes if available.
- Select the relevant physical drive.
- Open its properties and review the available drive information.
The exact information shown can vary depending on the SSD, Windows version, storage controller, and manufacturer.
If Windows reports a critical storage warning, do not ignore it. Back up important files before attempting troubleshooting or drive repairs.
Method 2: Check SSD Health with PowerShell
PowerShell is another useful option for checking the physical disk status.
Open PowerShell as an administrator and run:
Get-PhysicalDisk
Windows can return information such as:
- FriendlyName
- OperationalStatus
- HealthStatus
- Size
For more details about the available properties and health-status options, you can refer to Microsoft’s Get-PhysicalDisk documentation. Microsoft documents Healthy, Warning, Unhealthy, and Unknown as supported physical disk health states.
Microsoft documents the Get-PhysicalDisk command as a way to retrieve physical disk objects and their properties, including health status.
For a simple health check, look at the HealthStatus value.
A result such as Healthy indicates that Windows currently considers the physical disk healthy through the storage management interface. Other states can include Warning, Unhealthy, or Unknown.
This method is convenient, but it may not show the detailed SMART attributes that enthusiast and diagnostic tools provide.
Method 3: Use a Dedicated SSD Health Tool
If you want more detailed information, a dedicated SMART monitoring application can be more useful.
Tools such as CrystalDiskInfo can display information including:
- Drive temperature
- Health condition
- Power-on hours
- Total host reads and writes
- SMART attributes
- Firmware version
- Interface information
When using a third-party tool, download it from the official developer or a trusted source. Avoid random websites offering modified versions of storage utilities.
A dedicated diagnostic tool is particularly useful when Windows reports that everything is normal but you are experiencing unusual drive behavior.
How to Check SSD Health on Mac
Mac users have several built-in storage tools, although the amount of SMART information visible through macOS can depend on the Mac model and storage configuration.
Method 1: Check Drive Information in Disk Utility
Apple’s Disk Utility can display information about a selected storage device, including capacity, format, available space, and, where supported, SMART status.
To inspect a drive:
- Open Disk Utility.
- Select View.
- Choose Show All Devices.
- Select the physical storage device in the sidebar.
- Click Info.
- Review the information displayed for the drive.
Apple notes that SMART status represents the disk’s general working condition where that information is available.
If you see a warning indicating that a disk is about to fail, prioritize your backup rather than trying to repair the hardware. Apple specifically recommends backing up data and replacing a disk that Disk Utility reports is about to fail.
Method 2: Run First Aid in Disk Utility
Disk Utility also includes First Aid, which can check and repair certain formatting and directory-structure problems.
However, First Aid is not a replacement for monitoring SSD health. A drive can have a healthy file system while its underlying hardware is approaching the end of its useful life.
To use First Aid:
- Open Disk Utility.
- Select the relevant volume.
- Click First Aid.
- Follow the instructions.
- Repeat for the container or physical device when appropriate.
If you want to understand what First Aid checks and how Apple recommends running it across volumes, containers, and the physical storage device, see Apple’s First Aid guidance. Apple recommends having a current backup before attempting repairs because Disk Utility may encounter errors it cannot repair.
Apple explains that Disk Utility can fix certain disk problems but cannot detect or repair every possible storage problem.
What SSD Health Percentage Really Means
One of the most confusing parts of how to check SSD health is understanding percentage values.
A health percentage is not necessarily a universal prediction of how many days or months your SSD has left.
For example, a tool might report:
| Health reading | What it generally indicates |
|---|---|
| 100% | Little or no reported wear |
| 90% | Some wear has been recorded |
| 80% | Noticeable wear, but not automatically a failure |
| 50% | Significant wear has accumulated |
| Warning | Investigate the reported condition |
| Bad/Critical | Back up data and investigate replacement |
These values should not be treated as universal replacement thresholds. SSD manufacturers calculate health differently, and SMART attributes vary between models.
An SSD showing 80% health is not automatically about to fail. Likewise, a drive reporting 100% health is not a guarantee that it cannot suddenly develop a hardware fault.
The most useful approach is to monitor the trend over time and pay attention to warnings, errors, temperature, and unusual behavior.
Which SSD Health Information Should You Watch?
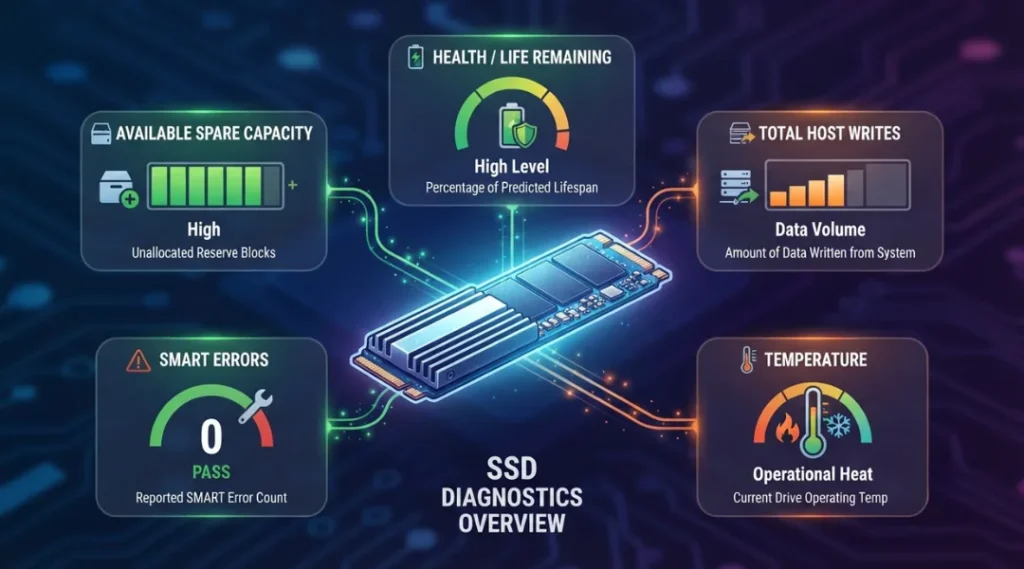
When checking an SSD, do not focus on a single number.
1. Health or Life Remaining
This is a useful high-level indicator of reported wear. If the value drops rapidly between checks, investigate further.
2. Total Host Writes
This tells you approximately how much data has been written to the drive.
Compare this with the SSD manufacturer’s endurance specification when available. Enterprise, consumer, SATA, and NVMe SSDs can have very different endurance ratings.
3. Temperature
High temperatures can affect SSD performance and may contribute to thermal throttling on some NVMe drives.
If the SSD repeatedly becomes unusually hot during normal workloads, investigate airflow, heatsinks, laptop cooling, and workload patterns.
4. SMART Errors
SMART information can reveal warnings that are more meaningful than a simple health percentage.
Pay particular attention to critical warnings, media errors, uncorrectable errors, or other attributes that the SSD manufacturer identifies as significant.
5. Available Spare
Some SSDs maintain spare NAND capacity that can be used when blocks become unusable.
A significant reduction in available spare capacity can be a reason to investigate the drive more closely.
Signs That Your SSD May Be Failing
Knowing how to check SSD health is useful, but symptoms can also provide important clues.
Watch for:
- Unexpected system freezes
- Frequent boot failures
- Files becoming corrupted
- Applications suddenly crashing while accessing files
- Extremely slow file operations
- Repeated operating system repair messages
- SMART warnings
- Disappearing drives
- Unexpected read or write errors
- A drive that intermittently disconnects
One symptom alone does not prove SSD failure. For example, a slow computer can also be caused by insufficient RAM, background processes, low free space, overheating, or software problems.
If your laptop is slow overall, see ZProStudio’s guide on why your laptop is so slow rather than assuming the SSD is automatically the problem.
SSD Health vs SSD Performance
SSD health and SSD performance are two different things.
A drive can report healthy SMART information but still perform poorly because:
- The drive is nearly full.
- The workload is unusually heavy.
- The SSD is overheating.
- The storage interface is limiting performance.
- Background processes are consuming resources.
- The system is using an older or problematic driver.
- The SSD is being used for a workload it was not designed to handle.
Likewise, a benchmark showing reduced speed does not automatically mean the SSD is physically failing.
This distinction is important when deciding how to check SSD health. Health monitoring tells you about the drive’s condition, while performance testing tells you how quickly the drive can currently read or write data.
What to Do If Your SSD Health Is Low
If your diagnostic software reports a concerning condition, do not immediately start experimenting with repair utilities.
First, protect your data.
Step 1: Back Up Important Files
Copy important documents, photos, videos, projects, and other irreplaceable data to another storage device or a trusted backup service.
Step 2: Record the Drive Information
Note the SSD model, capacity, firmware version, health percentage, temperature, and important SMART warnings.
This information can be useful when contacting the manufacturer or deciding on a replacement.
Step 3: Check the Manufacturer’s Documentation
SSD manufacturers can use different SMART attributes and health calculations. A warning that looks confusing in a generic diagnostic application may be explained in the manufacturer’s documentation.
Step 4: Avoid Unnecessary Stress Testing
If the drive is already showing serious warning signs, repeatedly running intensive benchmarks is not the priority. Your first priority should be protecting the data.
Step 5: Replace the Drive When Necessary
If the SSD is reporting critical errors or the manufacturer recommends replacement, replace it rather than relying on the drive for important data.
How Often Should You Check SSD Health?
For a normal personal computer, checking SSD health every few months is generally sufficient.
You may want to monitor it more frequently if:
- The computer contains important work files.
- The SSD is several years old.
- The drive has heavy daily write activity.
- You regularly edit large videos.
- You use the computer for virtual machines.
- You have noticed unexplained storage problems.
- A diagnostic tool has already reported a warning.
A simple periodic check is better than waiting until the computer refuses to boot.
Common Mistakes When Checking SSD Health
There are a few mistakes worth avoiding.
Mistake 1: Treating health percentage as an exact lifespan.
A percentage is an indicator, not a countdown clock.
Mistake 2: Confusing free space with hardware health.
Having lots of free storage does not prove that the NAND or controller is healthy.
Mistake 3: Using one diagnostic result as absolute proof.
If a tool reports something unusual, compare it with the operating system, manufacturer documentation, and other available information.
Mistake 4: Ignoring backups.
Even a healthy SSD can fail unexpectedly. Health monitoring should complement a backup strategy, not replace it.
Mistake 5: Downloading random SSD utilities.
Use reputable diagnostic software and official manufacturer resources whenever possible.
Frequently Asked Questions
Yes. Reading SMART information or checking the drive's reported health is normally a diagnostic operation and does not erase your files.
For most personal computers, every few months is reasonable. Check more frequently if the SSD has heavy workloads or has already shown warning signs.
Yes. A health indicator is based on available diagnostic information and does not guarantee that a drive can never fail.
Not necessarily. The meaning depends on the SSD manufacturer, the specific SMART attributes, and whether the drive reports errors or critical warnings. Back up important data and investigate the manufacturer's guidance.
Yes. Windows provides built-in storage management information, and PowerShell's Get-PhysicalDisk can report physical disk health status on supported configurations.
Yes. Disk Utility can provide storage information and, where supported, SMART status. Apple also provides First Aid for checking and repairing certain file-system and directory-structure problems.
It can, but not every performance problem is caused by SSD health. A nearly full drive, thermal throttling, background processes, or other hardware and software problems can also affect performance.
Final Thoughts
Learning how to check SSD health gives you an early warning system for storage problems. You can start with Windows’ built-in tools, PowerShell, or Disk Utility on Mac, then use a reputable SMART monitoring application when you need more detailed information.
Do not judge an SSD using only one percentage. Look at health status, SMART warnings, temperature, total writes, errors, and changes over time.
Most importantly, do not wait for a failing SSD to remind you about backups. If a diagnostic tool reports a serious warning, protect your important data first and investigate the drive afterward.
A five-minute health check every few months can help you identify storage problems before they turn into an unexpected data-loss situation.