How to Fix Printer Streaks
Streaky, faded, or line-marked printouts are one of the most common printer complaints, and one of the easiest to fix once you know the cause. In this guide, I’ll walk you through every practical fix I’ve used over more than a decade of troubleshooting inkjet and laser printers, from a five-minute cleaning cycle to knowing exactly when a part needs replacing.
Printer streaks are almost always caused by one of four things: clogged print nozzles, a dirty or worn drum unit, low or unevenly distributed ink or toner, or a dirty encoder strip. Running your printer’s built-in cleaning cycle, wiping the print head or drum with a lint-free cloth and isopropyl alcohol, and replacing worn cartridges or drum units resolves the issue in most cases.
Table of Contents
ToggleWhat Causes Printer Streaks?
Printer streaking happens when something interrupts the even transfer of ink or toner onto the page. The most common causes include:
- Clogged print head nozzles on inkjet printers, usually from dried ink after periods of inactivity.
- Worn or dirty drum units on laser printers, which leave repeating vertical lines or smudges.
- Low, expired, or improperly seated ink cartridges or toner.
- A dirty encoder strip, the thin plastic film inside the printer that tracks print head position.
- Dust or debris on the scanner glass, if you’re seeing streaks on copies rather than direct prints.
- Outdated or corrupted printer drivers sending incorrect data to the print engine.
- Low-quality or damp paper that doesn’t absorb ink evenly.
Identifying which of these applies to your situation is the fastest route to a permanent fix, rather than a temporary one.
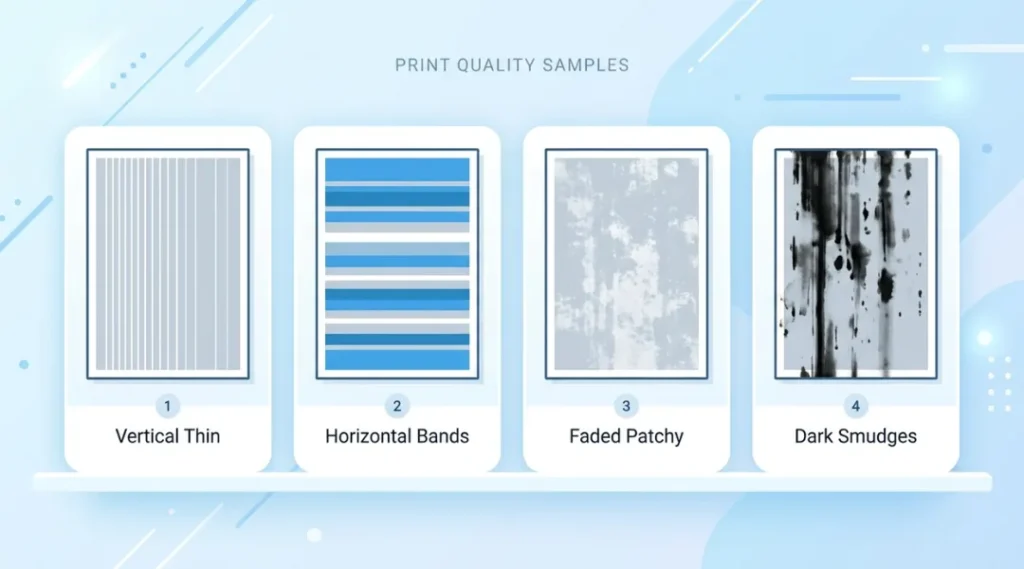
Types of Printer Streaks and What They Mean
Not all streaks are created equal, and the pattern you see is actually a diagnostic clue.
| Streak Pattern | Likely Cause |
|---|---|
| Thin vertical white lines | Clogged nozzle or dirty print head |
| Horizontal bands at regular intervals | Dirty encoder strip or drum gear issue |
| Faded or patchy streaks | Low ink/toner or uneven cartridge distribution |
| Dark, smudged vertical streaks (laser) | Worn drum unit or toner leakage |
| Streaks only on copies, not prints | Dirty scanner glass |
| Random streaks that change position | Paper dust or debris inside the paper path |
Before You Start: Quick Diagnostic Checklist
Before diving into repairs, rule out the basics. This takes less than five minutes and solves the problem more often than people expect.
- Print a nozzle check or test page from your printer’s control panel or software.
- Check ink or toner levels through the printer’s app or built-in display.
- Confirm you’re using the correct paper type and weight setting for your job.
- Remove and reseat the ink cartridges or toner unit.
- Restart the printer completely, not just the print job.
If streaks persist after these steps, move on to the printer-specific fixes below.
How to Fix Streaks on an Inkjet Printer
Inkjet printers are especially prone to streaking because the print heads use tiny nozzles that dry out quickly without regular use.
Step 1: Run the Built-In Print Head Cleaning Cycle
Every major inkjet brand, including HP, Canon, and Epson, includes a software-based cleaning utility. This flushes a small amount of ink through the nozzles to clear light clogs.
- Open your printer software or app.
- Navigate to Maintenance or Printer Utilities.
- Select “Clean Print Heads” and run the cycle.
- Print a nozzle check pattern afterward to confirm the streaks are gone.
If one cycle doesn’t fully clear it, run it a second time, but avoid running it more than three times in a row, since excessive cleaning cycles waste ink without improving results.
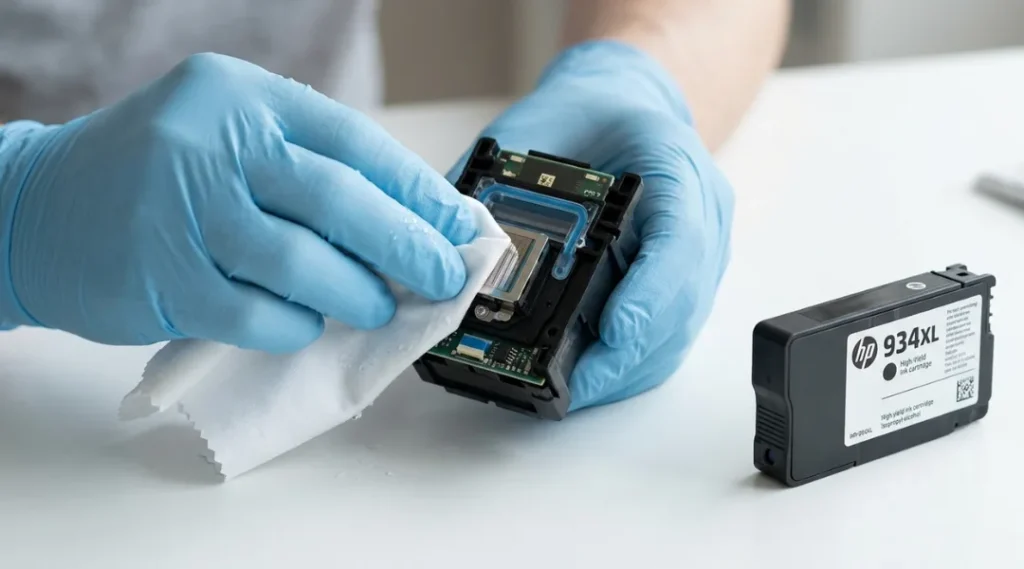
Step 2: Manually Clean the Print Head
If the software cleaning cycle doesn’t resolve it, a manual clean often does.
- Power off the printer and unplug it.
- Remove the ink cartridges or print head assembly, depending on your model.
- Dampen a lint-free cloth or cotton swab with isopropyl alcohol (90% or higher).
- Gently wipe the print head contacts and nozzle plate.
- Let it air dry for 10 to 15 minutes before reassembling.
Step 3: Align the Print Head
Misalignment can cause faint streaking that looks like a clog but isn’t. Most printer software has a “Print Head Alignment” tool under the maintenance menu. Run it, then reprint your test page.
Step 4: Replace Old or Low Cartridges
Ink cartridges that sit unused for months tend to dry out internally even if the level indicator shows ink remaining. If cleaning and alignment don’t help, swap in a fresh cartridge before assuming there’s a hardware fault.
How to Fix Streaks on a Laser Printer
Laser printers streak for different reasons than inkjets, usually related to the toner cartridge or the internal drum rather than nozzles.
Step 1: Remove and Gently Shake the Toner Cartridge
Uneven toner distribution is the single most common cause of laser printer streaks. Remove the cartridge and rock it gently side to side five or six times to redistribute the toner evenly, then reinsert it.
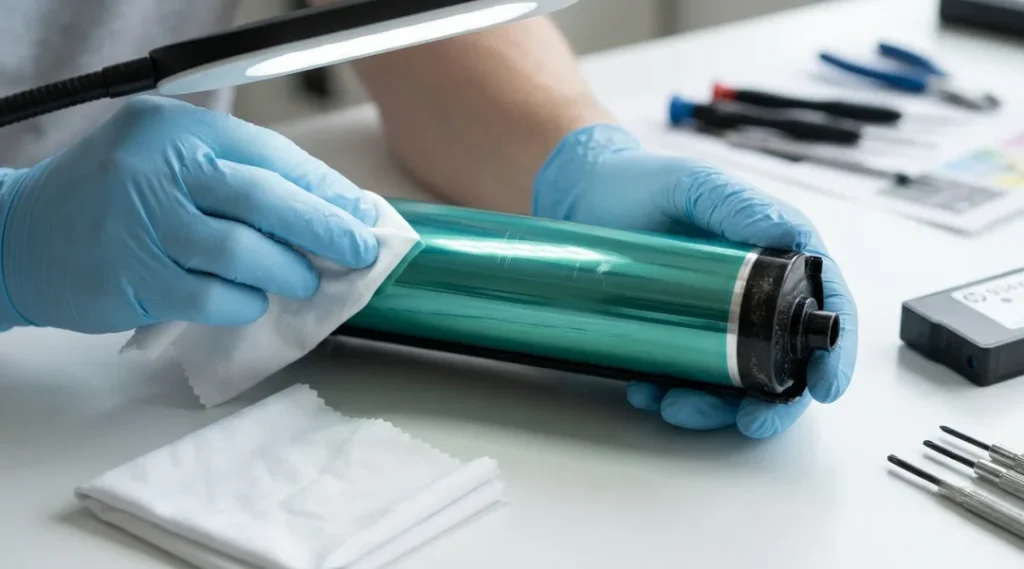
Step 2: Inspect and Clean the Drum Unit
A scratched, dirty, or worn drum produces repeating vertical streaks or smudges at consistent intervals down the page.
- Remove the drum unit according to your model’s manual.
- Wipe it gently with a soft, dry, lint-free cloth. Avoid alcohol or water on the drum surface.
- Check for visible scratches or worn spots. If the drum is physically damaged, it needs replacement rather than cleaning.
Step 3: Clean the Corona Wire or Charge Roller
Dust buildup on the corona wire (in older laser models) or charge roller can cause faint, consistent streaking. Most manufacturers include a small cleaning tool or brush with the printer for this exact purpose. Refer to your model’s manual before touching this component, as it’s delicate.
Step 4: Replace the Drum Unit if It’s Worn
Drum units typically last significantly longer than toner cartridges, but they do wear out. If streaks return shortly after cleaning and toner isn’t the cause, a worn drum is the most likely culprit.
Fixing Streaks Caused by Software or Driver Issues
Sometimes the printer hardware is fine, and the streaking is coming from how data reaches the print engine.
- Update your printer driver to the latest version from the manufacturer’s official support page.
- Uninstall and reinstall the driver if updating doesn’t help, since a corrupted driver file can cause inconsistent output.
- Lower the print resolution setting temporarily to test whether the issue is resolution-related rather than mechanical.
- Try printing from a different device or app to rule out a document or software conflict.
While you’re in the print dialog troubleshooting driver settings, it’s worth double-checking other options that quietly reset after updates. We’ve had readers ask what does collate mean when printing after a driver update silently flipped their default, turning a quick multi-copy job into an hour of hand-sorting alongside their streak issue.
Environmental and Paper-Related Causes
Streaks aren’t always a printer fault. External factors matter more than most people realize.
- Humidity: High humidity causes paper to absorb ink unevenly, creating streak-like patterns. Store paper in a dry, sealed environment.
- Paper weight and type: Using paper that’s too thin, too glossy, or not rated for your printer type can cause streaking. Match the paper setting in your print dialog to the actual paper loaded.
Printer streaks can also become an issue when printing restored photo scans, if you’re working with old film, our guide on scanning negatives at home walks through the full digitizing process before you print your results.
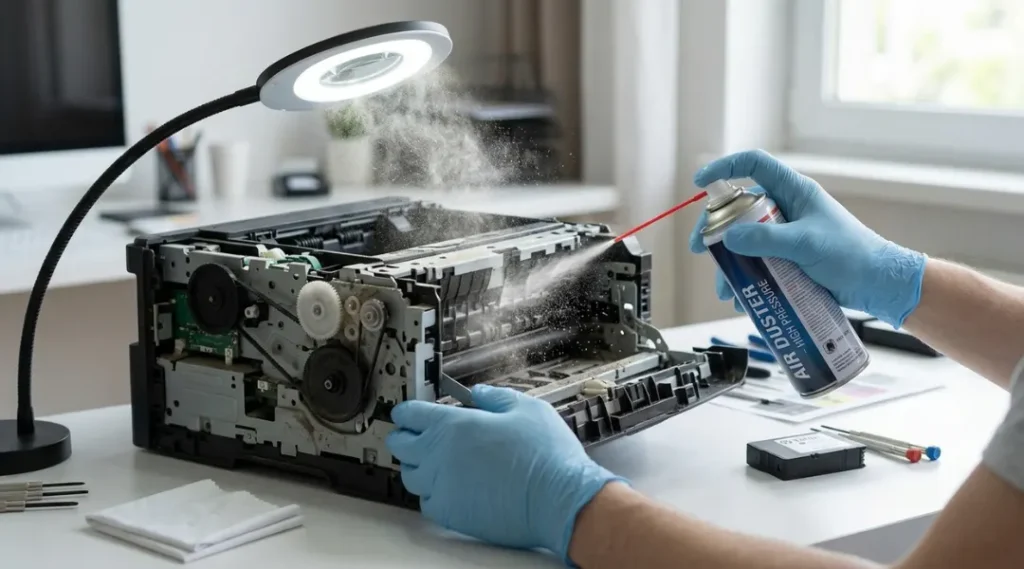
- Dust in the paper path: Especially in offices or workshops, dust accumulates inside the printer and transfers onto pages. A can of compressed air can clear this safely.
When to Replace a Part Instead of Cleaning It
Cleaning solves the majority of streaking issues, but some situations call for a replacement part:
- The drum unit shows visible scratches or has exceeded its rated page yield.
- The print head is physically cracked or the nozzles are permanently clogged, common on inkjets that sat unused for over a year.
- The toner cartridge is leaking internally rather than simply running low.
- The encoder strip is torn, warped, or has visible ink residue that won’t wipe clean.
If you’ve cleaned and reset everything above and streaks persist, it’s usually more cost-effective to replace the specific worn part than to keep troubleshooting.
Preventive Maintenance Tips to Stop Streaks From Coming Back
- Print at least one test page weekly if the printer isn’t in daily use, to prevent nozzle clogs.
- Store spare cartridges in a cool, dry place, away from direct sunlight.
- Clean the paper path and exterior vents every few months with compressed air.
- Use manufacturer-recommended paper weights and finishes.
- Keep printer drivers and firmware updated, since manufacturers frequently patch print-quality bugs.
If you’re printing QR codes, follow our complete QR Code Guide to ensure they scan correctly after printing.
- Avoid frequent power cycling mid-print, which can leave ink or toner unevenly applied.
Frequently Asked Questions
This is almost always a clogged nozzle (inkjet) or uneven toner (laser) rather than a hardware failure. Run a cleaning cycle first before assuming a part is broken.
Yes. Ink can dry unevenly inside a cartridge that's near empty, causing partial nozzle clogs even when the indicator shows a small amount remaining.
Most major brands, including HP, Canon, Epson, and Brother, include a software-based cleaning and alignment utility accessible through their printer app or driver settings.
Only when you notice print quality issues. Running cleaning cycles too often wastes ink without added benefit.
Yes, as long as you use a dry, lint-free cloth and avoid liquids or abrasive materials on the drum surface. Always check your printer's manual for model-specific guidance first.
Final Thoughts
Printer streaks are frustrating, but they’re rarely a sign of a failing machine. In most cases, the fix is a cleaning cycle, a cartridge swap, or a five-minute wipe-down of the print head or drum. Work through the diagnostics in order, inkjet or laser, software or hardware, and you’ll usually isolate the cause well before you need to consider a replacement part or a service call.