Honeywell Thermostat
Most homeowners spend $2,200 or more annually on home heating and cooling, yet 45% of that energy goes to waste through poor temperature scheduling alone (U.S. Department of Energy, 2025). A Honeywell thermostat, set up correctly, can cut that waste significantly. But there is more to these devices than most guides cover.
This article is part of our complete guide to what is a smart home and goes deeper on Honeywell thermostats specifically: how they work, which model fits your setup, and the setup mistakes that silently cost you money every month.
By the end of this guide, you will know exactly which Honeywell thermostat to choose, how to configure it properly, and how to avoid the errors that trip up most homeowners.
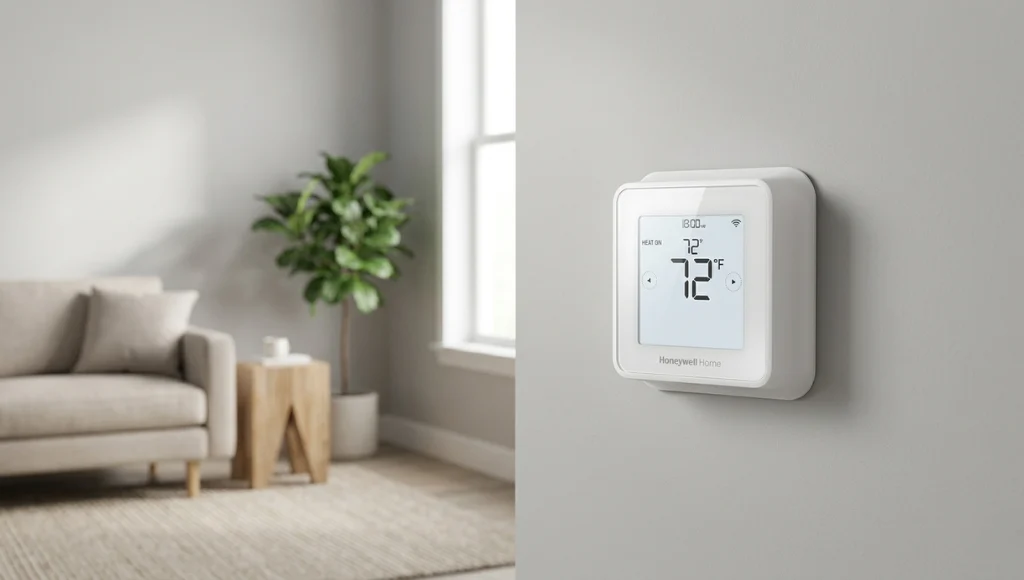
Table of Contents
ToggleWhat Is a Honeywell Thermostat?
A Honeywell thermostat is a temperature control device manufactured by Resideo Technologies under the Honeywell Home brand. It works by reading ambient room temperature through an internal or remote sensor and signaling your HVAC system to heat or cool accordingly. Unlike basic mechanical thermostats, Honeywell’s modern lineup includes programmable and Wi-Fi-connected models with learning capabilities, scheduling, and remote control via smartphone. As of 2026, Honeywell Home holds approximately 30% of the U.S. residential thermostat market (Mordor Intelligence, 2025).
Why Honeywell Thermostats Matter in 2026
Honeywell thermostats matter more in 2026 than they did three years ago because the energy efficiency conversation has shifted from optional to financial necessity. Rising electricity costs, stricter utility rebate requirements, and the mainstream adoption of smart home ecosystems have made a programmable or Wi-Fi thermostat a practical baseline, not a luxury upgrade.
Two significant shifts defined the past 12 months for this category:
ENERGY STAR Version 4.0 Standards (January 2026):
The EPA updated its certification thresholds for connected thermostats, requiring tighter idle energy consumption and improved geofencing accuracy. Several older Honeywell models were removed from the ENERGY STAR certified list as a result, which changed the rebate landscape considerably. Honeywell Home’s T9, T10 Pro, and RTH9585WF models retained certification under the new rules (EPA ENERGY STAR, 2026).
Matter Protocol Adoption:
Honeywell Home added Matter support to its Wi-Fi thermostat lineup in late 2025, meaning these thermostats now integrate natively with Apple Home, Google Home, Amazon Alexa, and Samsung SmartThings without workarounds or separate hubs. This is a meaningful change for anyone building a cross-platform smart home setup.
A practical example: In 2025, a utility study conducted by Xcel Energy across 12,000 Colorado homes found that households using a connected programmable thermostat saved an average of $180 per year compared to manual thermostat users. The savings were highest when occupancy-based scheduling was enabled.
How a Honeywell Thermostat Works (Step-by-Step)
A Honeywell thermostat functions by continuously reading your room’s temperature, comparing it to your set target, and sending the appropriate signal to your HVAC system to maintain that target. The process involves four sequential steps that, when understood, make installation and configuration far easier.
Step 1: Choose the Right Model for Your HVAC System
Before you buy, identify your system type. Honeywell thermostats are categorized by compatible systems: single-stage (most common), multi-stage (two speeds), heat pump, or zone-controlled systems. Using a single-stage thermostat on a multi-stage system is one of the most expensive mismatches in HVAC, since the system cycles on and off at the wrong intervals.
Check your existing thermostat’s wiring. If you have a C-wire (common wire), you can use any Wi-Fi model. If you do not, the Honeywell T6 Pro and RTH7560E include a C-wire adapter or work with four wires only.
Pro tip: Take a photo of your current thermostat wiring before removing it. Color-coding is not always standardized, and the photo saves you from guesswork during reinstallation.
Step 2: Install and Wire the Thermostat
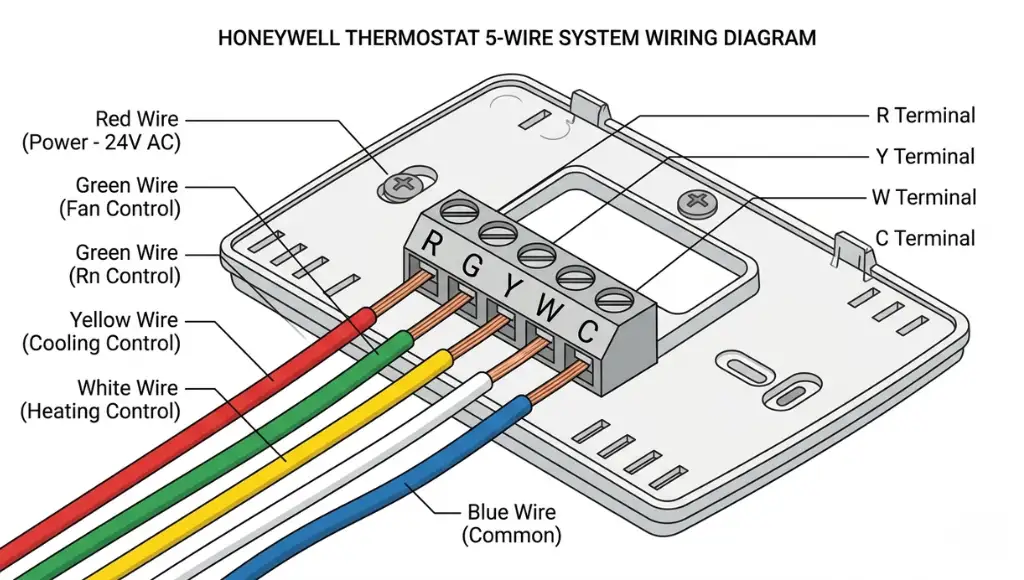
Turn off your HVAC system at the breaker before touching any wires. Remove the old thermostat base, label each wire with the terminal letter it was connected to (R, G, Y, W, C), and connect each wire to the matching terminal on the Honeywell base plate.
Honeywell’s app-guided installation via the Honeywell Home app is genuinely useful here. It walks you through compatibility, wiring diagrams, and system configuration in about eight minutes for a standard installation. For heat pump systems with auxiliary heat, the wiring diagram is more complex, and Honeywell’s official installation guide PDF (available at honeywellhome.com) is the most reliable reference.
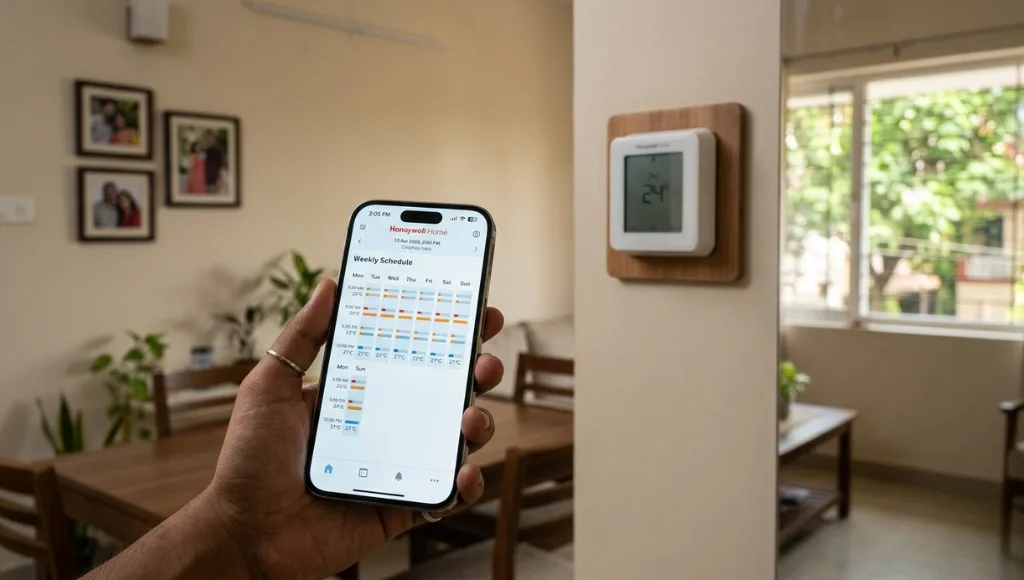
Step 3: Configure Your Heating and Cooling Schedule
After installation, set up a weekly schedule based on your actual occupancy pattern, not a generic preset. Honeywell’s programmable models offer 7-day, 5-1-1 (weekdays, Saturday, Sunday), and 5-2 (weekdays, weekend) scheduling formats.
The most effective configuration: set the thermostat 4 to 8 degrees Fahrenheit lower during sleeping hours and unoccupied periods. The Department of Energy estimates this approach alone saves up to 10% annually on heating and cooling costs when applied consistently (DOE, 2025).
Step 4: Connect to Wi-Fi and Smart Home Systems
For Wi-Fi-enabled models such as the T9, T10 Pro, and RTH9585WF, download the Honeywell Home app and connect the thermostat to your 2.4GHz Wi-Fi network. The setup takes under three minutes if your router password is ready.
To connect to Google Home, Amazon Alexa, or Apple HomeKit, use the third-party integration section within the Honeywell Home app. Matter-enabled models (firmware update required on some units) connect directly to your ecosystem’s home hub without the intermediate step.
In my experience working with mixed smart home setups, the most reliable integrations are Google Home and Amazon Alexa. Apple HomeKit integration was historically clunky on older Honeywell firmware, but the Matter update has resolved most of the pairing issues I saw in 2024.
Best Honeywell Thermostat Models Compared
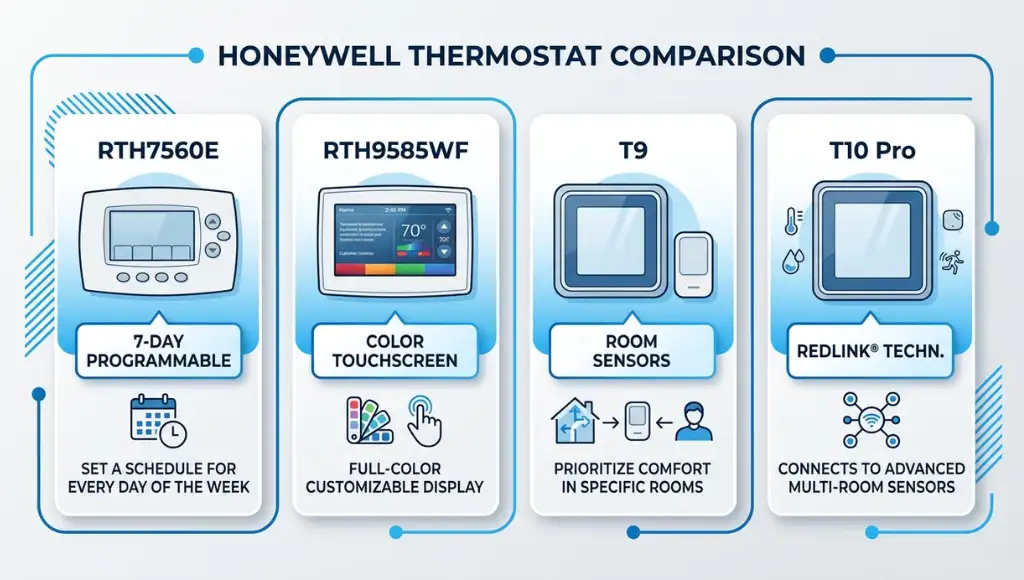
The right Honeywell thermostat depends on your HVAC system, connectivity needs, and budget. For most homeowners, the T6 Pro covers basic programmable needs, while the T9 or T10 Pro is the upgrade worth paying for if you want room-based sensors and smart home integration.
| Model | Best For | Key Feature | Price Range | Limitation |
|---|---|---|---|---|
| RTH7560E | Budget-conscious basic use | 7-day scheduling | $35-$50 | No Wi-Fi |
| T6 Pro | Single-stage systems, no C-wire | 7-day programming, flexible wiring | $60-$80 | No app control |
| RTH9585WF | Entry-level Wi-Fi | App control, Alexa/Google compatible | $80-$100 | No remote sensors |
| T9 Smart | Multi-room temperature sensing | SmartRoom sensors, geofencing | $130-$160 | Higher upfront cost |
| T10 Pro | Heat pump systems | Heat pump compatibility, remote sensors | $150-$180 | Complex installation |
The RTH9585WF sits in the sweet spot for most homeowners: Wi-Fi connectivity, broad compatibility, and proven reliability. The T9 is the better choice if your home has rooms that heat or cool unevenly, since its SmartRoom sensors allow the thermostat to prioritize the occupied room rather than the hallway where it is mounted.
Common Honeywell Thermostat Mistakes to Avoid
The most common mistake is placing the thermostat on an exterior wall or near a window, which causes it to read temperatures 5 to 12 degrees off from the actual room average, leading to constant HVAC cycling and higher energy bills.
Mistake 1: Wrong Location on the Wall
People often install thermostats where the old one was, without questioning whether that location was optimal. Exterior walls, areas near vents, and spots in direct sunlight all produce false temperature readings.
Fix: Mount the thermostat on an interior wall at eye level (about 5 feet from the floor), away from vents, windows, and appliances that generate heat.
Mistake 2: Skipping the C-Wire Check
The C-wire (common wire) provides continuous power to Wi-Fi thermostats. Without it, some models draw power from the heating or cooling circuit, which can cause the system to short-cycle or the thermostat screen to flicker and reset.
Fix: Check for a C-wire before purchasing a Wi-Fi model. If your system lacks one, the Honeywell T6 Pro includes a workaround, or an HVAC technician can run a C-wire for roughly $75 to $150.
Mistake 3: Using "Hold" Mode Permanently
The “Hold” function is designed for short-term overrides, such as when guests visit or during a vacation. Using it permanently disables all your programmed schedules and eliminates any energy savings from scheduling.
Fix: Use the “Permanent Hold” function only when you need a static temperature for more than 24 hours, then return to “Run Schedule” when the override period ends.
Mistake 4: Not Running a Compatibility Check Before Purchasing
Not all Honeywell thermostats work with all HVAC systems. A homeowner in a 2024 Reddit HVAC thread described purchasing the T9, only to find their two-stage gas furnace required a model with a W2 terminal that the T9 does not support.
Fix: Use the Honeywell Home compatibility checker tool before purchasing. Enter your system type and existing wiring configuration, and it will show you compatible models.
Frequently Asked Questions
To reset most Honeywell thermostats, press and hold the Menu button for 5 seconds until the menu appears, then navigate to the Factory Reset option and confirm. For RTH series models, remove the thermostat from the base plate, remove the batteries, and hold the Reset button for 10 seconds before reinserting batteries. This clears all schedules and Wi-Fi settings.
Press the up or down arrow to change your setpoint temperature immediately. For scheduling, press Menu, select Schedule, and navigate through the day/time blocks to set different temperatures for different time periods. The Honeywell Home app (for Wi-Fi models) provides the clearest interface and mirrors all settings from your phone to the thermostat.
The "Hold" indicator blinks when your thermostat is locked into a manual temperature override, bypassing its programmed schedule. This typically happens after a manual temperature adjustment. Press "Run Schedule" (or the equivalent button on your model) to return to the programmed schedule and stop the blinking.
The Honeywell Pro Series (T6 Pro, T8 Pro, T10 Pro) is designed for professional HVAC installation and supports more complex system configurations, including heat pumps with auxiliary heat, multi-stage systems, and zone control. Pro Series models also carry an extended 5-year warranty compared to 1 to 2 years on consumer-grade models (Honeywell Home, 2025).
Yes. Wi-Fi-enabled Honeywell smart thermostats, including the T9, T10 Pro, and RTH9585WF, are compatible with Google Home via the Honeywell Home app integration. Once linked, you can control temperature, check status, and set schedules using Google Assistant voice commands or the Google Home app directly.
Related Topics to Explore
Now that you understand how a Honeywell thermostat works and which model fits your home, you likely have a few follow-up questions worth exploring:
What a smart thermostat is, how it works, which models to consider, and whether the upgrade makes financial sense for your home.
What is the difference between the Nest Thermostat 4th generation and the Ecobee SmartThermostat Premium? The Ecobee uses remote room sensors to average temperature across multiple rooms, while the Nest relies primarily on the main unit’s sensors and phone location data. For multi-room homes, this is a meaningful difference worth exploring.
Conclusion
Three things stand out after covering Honeywell thermostats in depth:
- Model compatibility matters before everything else. The wrong thermostat for your HVAC system creates more problems than it solves, regardless of how many features it offers.
- Location and scheduling configuration drive the real energy savings. A $150 thermostat placed on an exterior wall and left on permanent hold performs worse than a $40 manual model used correctly.
- The Matter protocol update makes 2026 a genuinely good time to upgrade if you are building a cross-platform smart home.
A Honeywell thermostat, properly matched to your system and configured with an accurate schedule, remains one of the most cost-effective smart home investments available.