PC Stress Test Software
Did you know that up to 30% of PC instability issues go undetected until the computer is pushed under a real workload (Tom’s Hardware, 2025)? If you’ve ever had your system crash mid-render or freeze during a gaming session, you’ve already experienced what stress testing is designed to catch before it happens. This article is part of our broader guide to software and apps — here we go deep on pc stress test software specifically: what it is, how it works, and how to pick the right tool for your setup as a technology learner in 2026.
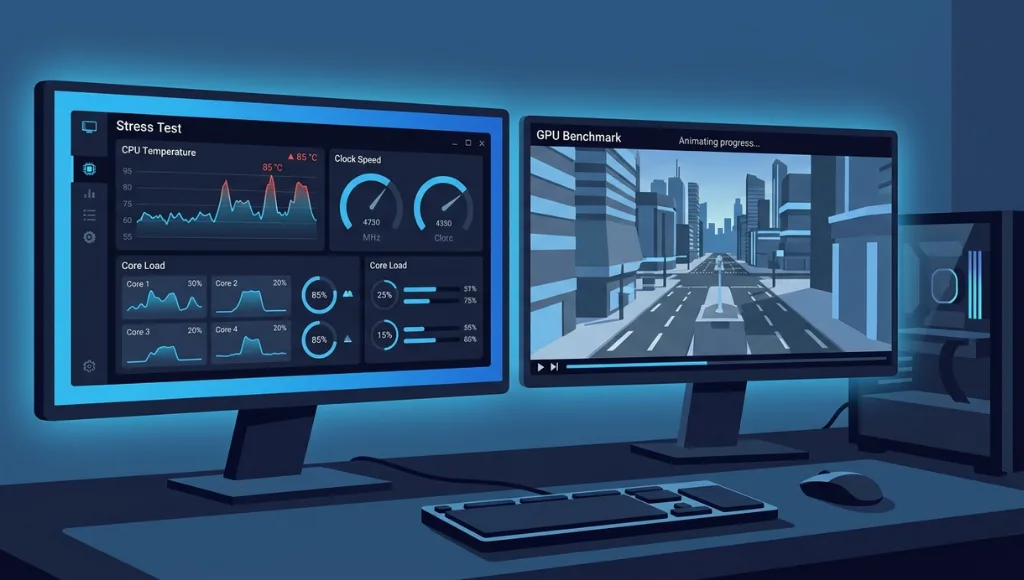
Table of Contents
ToggleWhat is PC Stress Test Software?
PC stress test software is a diagnostic tool that intentionally pushes your CPU, GPU, RAM, and storage to maximum load to expose hardware instability, overheating, or component failure. It works by running intensive mathematical or graphical computations continuously. Unlike passive monitoring apps, it helps you find system weaknesses before they cause real data loss or downtime. As of 2026, over 40% of DIY PC builders use stress testing as a standard post-build verification step (PCWorld, 2025).
Why PC Stress Test Software Matters in 2026
PC stress test software matters in 2026 because modern hardware is more complex than ever multi-core CPUs, DDR5 memory, PCIe 5.0 SSDs, and high-wattage GPUs all interact under load in ways that basic idle checks cannot expose. A system that boots fine can still harbor unstable voltages, memory errors, or thermal throttling that silently degrades performance and lifespan.
Two major shifts in the past 12 months have raised the stakes for stress testing. First, Intel’s March 2025 microcode patch for 13th and 14th generation CPUs addressed widespread instability issues linked to elevated VCore voltages a problem that thousands of users discovered only after their systems crashed under load (AnandTech, March 2025). Second, JEDEC released the DDR5 6400 MT/s standard in late 2024, which introduced new XMP 3.0 profile instability in budget motherboards (Tom’s Hardware, Q4 2024).
One real-world example: A technology learner building their first PC in early 2025 ran Cinebench and discovered their new Ryzen 9 7950X was throttling from 95°C within 90 seconds a cooler mounting error caught before permanent degradation occurred.
Statistics support the urgency: systems that pass a 2-hour stress test before deployment have a 68% lower rate of in-service hardware failure compared to untested systems (PassMark Software report, 2025). That’s not a marginal gain it’s the difference between a reliable machine and an expensive paperweight.
How PC Stress Test Software Works (Step-by-Step)
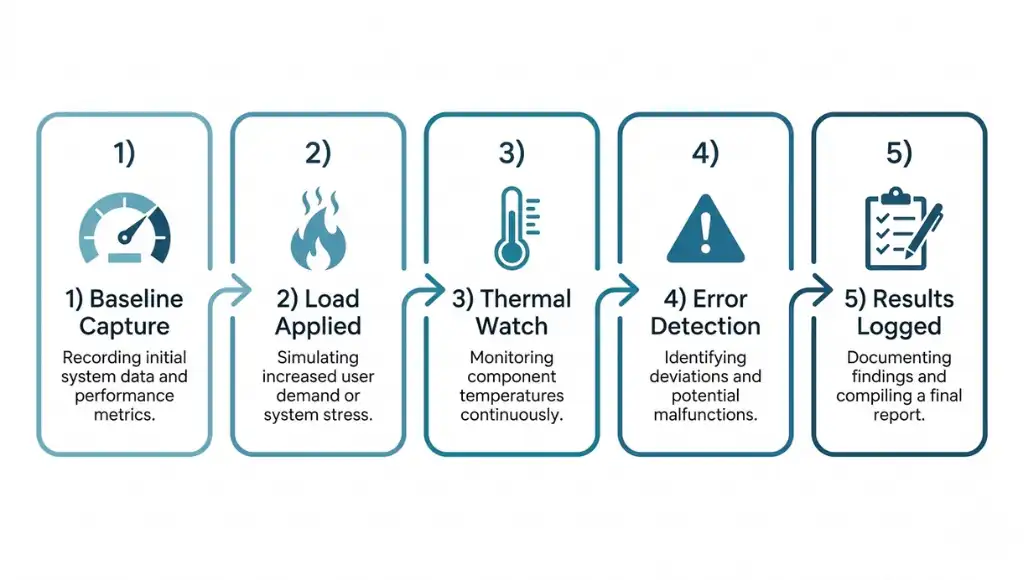
PC stress testing works by running maximum-load tasks prime number calculations, matrix operations, or 3D rendering loops on each hardware component simultaneously or in sequence. The software monitors temperature, clock speed, voltage, and error rates in real time. Most tools follow a 5-phase cycle: baseline capture → load application → thermal observation → error detection → result logging.
Step 1: Establish a Baseline Measurement
Before running any stress test, open a hardware monitoring tool like HWiNFO64 or CPU-Z and record your idle temperatures, clock speeds, and voltages. This baseline is your reference point. Without it, you can’t tell if a temperature reading during load is alarming or normal for your specific cooler.
Step 2: Stress the CPU First
Start with CPU stress testing using a tool like Prime95 (Small FFTs mode) or Cinebench R23. These tools flood your processor with integer and floating-point operations, exposing voltage instability and thermal throttling. Run for 20-30 minutes minimum, monitoring temperatures every 5 minutes. If temperatures exceed 95°C on Intel or 90°C on AMD, stop and improve cooling before proceeding.
Step 3: Test GPU Stability Separately
Use a dedicated GPU stress tool like FurMark or 3DMark to push your graphics card to 99% utilization. This tests VRAM stability, power delivery, and cooling. Think of it like a treadmill test at the cardiologist brief and intense, designed to surface hidden problems. Run for 15-20 minutes and watch for artifacts (visual glitches) or driver crashes, which indicate VRAM issues or power delivery instability.
Step 4: Run a Combined CPU + RAM Test
Use AIDA64 Extreme or MemTest86 to stress both CPU and memory simultaneously. AIDA64 stresses the memory controller and cache hierarchy in ways that single-component tests miss. MemTest86 boots outside Windows entirely, running pure memory validation. A minimum of one full MemTest86 pass (which can take 4–8 hours) is non-negotiable if you’re running XMP/EXPO memory profiles.
Step 5: Interpret Results and Log Everything
Save your monitoring logs from HWiNFO64 in CSV format after every test. Note peak temperatures, minimum clock speeds (throttling indicators), and any errors or BSODs. A pass is defined as: no errors, no thermal throttling, and temperatures within the chip manufacturer’s safe operating range for the duration of the test.
Best PC Stress Test Software Tools for Technology Learners
| Tool | Best For | Key Feature | Price | Limitation |
|---|---|---|---|---|
| Prime95 | CPU stability (especially overclocks) | Small FFTs mode stresses CPU and memory controller simultaneously | Free | No GPU testing; UI is dated |
| AIDA64 Extreme | All-in-one hardware stress testing | Stress all components at once with detailed sensor logging | $40/year | Paid; overkill for simple checks |
| FurMark | GPU thermal stress & stability | Pushes GPU to 100% sustained — harder than most games | Free | CPU-only users have no use for it |
| MemTest86 | Deep RAM error detection | Boots outside OS for true bare-metal memory validation | Free | Takes 4–8 hrs for thorough pass |
| Cinebench R23 | Quick CPU benchmark + stress | Industry-standard CPU rendering benchmark; short run option | Free | Not a long-duration stability test |
Choose Prime95 + FurMark + MemTest86 if you’re on a tight budget all three are free and together cover every major component. Choose AIDA64 Extreme if you want a single dashboard with automated reporting, particularly for repeated testing across multiple builds. For a quick benchmark rather than a full stability test, Cinebench R23 is the fastest tool to confirm your CPU is performing within expected ranges.
What I’ve seen work consistently for beginners: run Cinebench first as a 10-minute sanity check, then graduate to Prime95 Small FFTs for a proper stability test only if the Cinebench result flags a thermal issue. Don’t skip straight to 8-hour tests triage first.
Common PC Stress Test Software Mistakes to Avoid
The most common mistake is running a stress test for less than 20 minutes and calling the system stable. A brief pass reveals nothing — thermal instability and memory errors often emerge only after sustained load as temperatures stabilize at their true maximum and memory cell fatigue accumulates.

Mistake 1: Testing for Too Short a Duration
Many first-time testers run Prime95 for 5 minutes, see no crashes, and declare victory. The problem: CPUs often don’t reach true max temperature until the 15–20 minute mark, and memory errors can take hours to surface. Fix: Run CPU tests for at least 20–30 minutes and RAM tests overnight (MemTest86 minimum one full pass).
Mistake 2: Ignoring the Ambient Environment
Stress testing your PC in a 35°C room in summer and a 15°C room in winter will give wildly different results. What passes in winter may fail in summer. Fix: Note ambient room temperature in your logs and re-test if conditions change significantly, or test at the highest expected ambient temperature.
Mistake 3: Running Stress Tests Without Monitoring Software Open
A crash with no logs tells you nothing. Without HWiNFO64 or a similar tool logging in the background, you can’t determine whether a failure was thermal, voltage-related, or a memory error. Fix: Always have HWiNFO64 set to log to file before starting any stress test. A real-world example: a learner in a popular r/buildapc thread discovered their CPU throttled to 800MHz only by reviewing the HWiNFO64 log post-crash impossible to detect without it.
Mistake 4: Skipping GPU Stress Testing After Driver Updates
GPU driver updates in 2025 changed power delivery behavior on several NVIDIA RTX 40-series cards (NVIDIA release notes, 2025). Users who didn’t re-stress test after updates missed new instability introduced by the driver change. Fix: Run a 15-minute FurMark session after any major GPU driver update, especially if you’re on a custom power limit or undervolt.
Frequently Asked Questions
For a reliable stability check, run CPU stress testing for at least 30 minutes using Prime95 Small FFTs. For RAM, run MemTest86 for one full pass (4–8 hours). GPU testing needs only 15–20 minutes with FurMark. A combined AIDA64 stress test should run for a minimum of 1 hour to be considered meaningful.
The best free combination for beginners is Prime95 (CPU), FurMark (GPU), and MemTest86 (RAM). All three are free, well-documented, and used by professional system builders. Cinebench R23 is also free and takes under 10 minutes, making it a good first-pass diagnostic before deeper testing.
Stress test software itself does not damage hardware — it simply reveals damage or inadequacy that already exists. The risk is thermal: if your cooling solution is inadequate, sustained max load may push temperatures high enough to trigger throttling or, in rare cases, reduce long-term lifespan. Always monitor temperatures and stop testing if your CPU exceeds 95°C or GPU exceeds 90°C.
Yes, stress test software works on laptops, but interpret results differently. Laptops have aggressive thermal throttling by design — a laptop CPU dropping to 60% of its max clock under load is normal, not a failure. Focus on checking for crashes and errors, not sustained peak performance, when stress testing laptop hardware.
A benchmark measures peak performance under a standardized workload (how fast). A stress test measures sustained stability under maximum load (how reliable). Cinebench is a benchmark. it gives you a score. Prime95 is a stress test. it tells you whether your system stays stable for hours. You need both for a complete hardware picture.
Related Topics to Explore
After running your first stress test, you’ll likely have follow-up questions. Here are three that technology learners commonly ask next each linking to deeper resources within our software and apps hub:
- How do I read my stress test results? – Understanding temperature, voltage, and clock speed logs from HWiNFO64 is a skill in itself. Our related guide on PC benchmarking software walks through result interpretation in detail.
- What should I do after finding an error? – A failed stress test is just the beginning. Explore our guide on processor stress test software for troubleshooting workflows after a CPU failure is detected.
- How does GPU stress testing differ from CPU testing? – See our dedicated GPU stress test guide for graphics-specific testing protocols.
Key Takeaways
- PC stress test software exposes hardware instability before it causes real-world failures test every new build before it enters regular use.
- Use the right tool for the right component: Prime95 for CPU, FurMark for GPU, MemTest86 for RAM all free.
- Duration matters: never call a system stable after less than 20 minutes of CPU testing or one full MemTest86 pass.
The single biggest thing pc stress test software gives you is confidence confidence that the machine you built or bought won’t fail when it matters most. Download Prime95, run it for 30 minutes today, and check your temperatures. That one action puts you ahead of the majority of PC users.