How to Scan Negatives
Boxes of film negatives tend to sit in drawers for years, half-forgotten, slowly fading with every passing summer. If you have inherited a shoebox of 35mm strips or you shoot film yourself and want a digital archive, learning how to scan negatives properly is the single best way to protect those images before the film base degrades any further.
This guide walks through every practical method: flatbed scanners, dedicated film scanners, DSLR or mirrorless “camera scanning,” and even smartphone apps, along with the exact settings, software, and cleanup steps that separate a muddy, dust-covered scan from a sharp, archive-quality digital file.
Table of Contents
ToggleWhy Scanning Your Negatives Matters
Film negatives are chemically unstable. Color negatives shift toward magenta or yellow as the dyes fade, acetate-based film can develop “vinegar syndrome,” and even well-stored negatives pick up scratches, mold, and dust over time. According to preservation guidance published by the Library of Congress, digitizing photographic materials is one of the most reliable ways to protect image content against physical decay and loss, and even a carefully chosen home scanner can produce results that are more than adequate for personal collections.
Scanning also unlocks practical benefits that go beyond preservation:
- You can share, print, and edit images instantly instead of ordering fresh prints. If your prints come out uneven once you start printing scans at home, our guide on how to fix printer streaks can help you troubleshoot the issue.
- You gain the ability to correct color casts and exposure using modern editing tools.
- You create redundant backups, so a single damaged box no longer means losing decades of memories.
What You’ll Need Before You Start
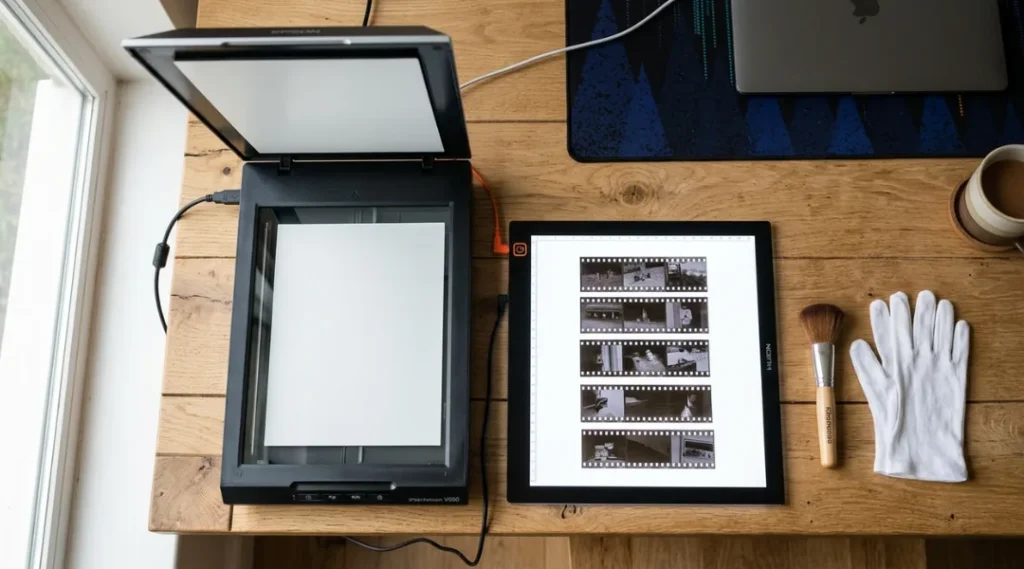
Before diving into any scanning method, gather the basics. Skipping this step is the number one reason home scans come out soft, dusty, or color-shifted.
Supporting keyword focus: scan film negatives at home
- Clean negatives. Use a soft anti-static brush or a rocket blower to remove dust before scanning; never wipe dry film with a cloth, since grit can scratch the emulsion.
- Lint-free cotton gloves. Fingerprints etch into film over time and are difficult to remove digitally.
- A stable, dust-free workspace. Scan in a room with minimal airflow and clean the scanner glass with a microfiber cloth before every session.
- A scanning device. This can be a flatbed scanner with a transparency unit, a dedicated film scanner, or a DSLR/mirrorless camera with a macro lens and a light source.
- Editing or scanning software. Options range from the manufacturer’s bundled software to advanced tools like VueScan or SilverFast.
Method 1: Scanning Negatives with a Flatbed Scanner
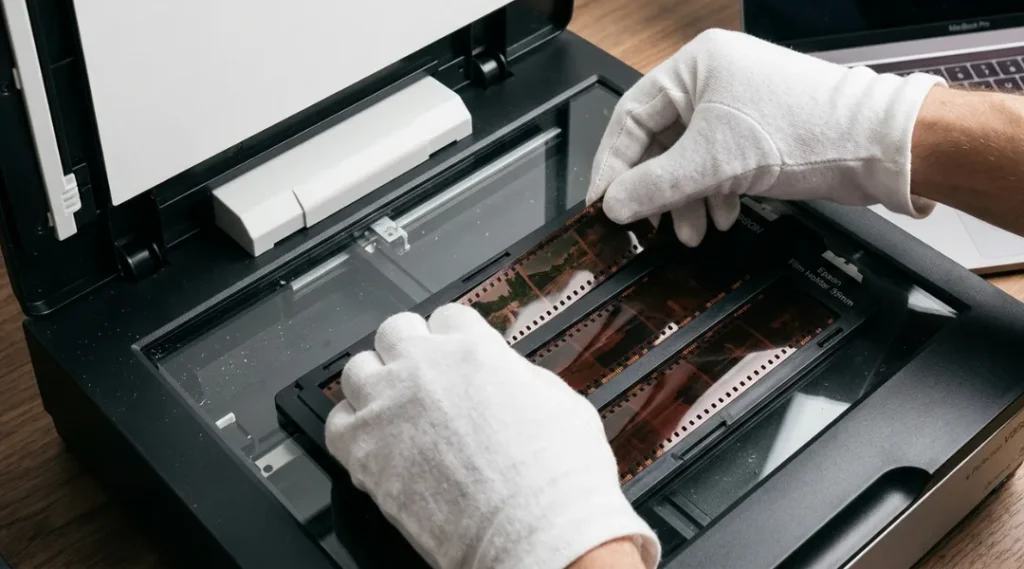
A flatbed scanner for negatives is the most accessible entry point for most people, especially if you already have one for documents and photo prints. The key requirement is a built-in transparency unit (TPU), a backlight in the scanner lid that shines light through the film so the sensor can read the image instead of just photographing an opaque surface.
Popular consumer models, such as the Epson Perfection V600 and V850, include a transparency unit and dedicated film holders for 35mm strips, mounted slides, and medium format film, and are widely used for home digitization of slides, negatives, and panoramic film.
Step-by-step process:
- Remove the white reflective document mat from inside the scanner lid to expose the transparency unit.
- Load the negative strip into the correct film holder (35mm, 120, or 4×5), emulsion side down, so the image is not flipped.
- Place the loaded holder on the scanner glass, aligning it with the guide marks.
- Open the scanning software and select “Film” as the document type, then choose “Color Negative Film” or “B&W Negative Film.”
- Run a preview scan to check alignment, then set the resolution (see the section below) and enable dust removal if available.
- Scan, save as a lossless TIFF for archiving, and export a JPEG copy for everyday sharing.
Recommended settings for a flatbed scan:
| Setting | Recommendation |
|---|---|
| Resolution | 2400–4800 dpi for 35mm negatives |
| File format | TIFF for archival copies, JPEG for sharing |
| Color depth | 48-bit color / 16-bit grayscale |
| Dust removal | Enable hardware-based infrared dust removal if the scanner supports it |
Method 2: Using a Dedicated Film Scanner
If you shoot a large volume of film or want the sharpest possible results, a dedicated film scanner is worth the investment. Unlike a flatbed unit, these scanners are purpose-built around a fixed focal length and a bright, even light source designed specifically for 35mm or medium format negatives, which typically produces noticeably higher resolution and sharper grain rendition.
Dedicated scanners also tend to include automated batch feeding for entire rolls, which is a major time-saver if you are digitizing hundreds of frames from an old family archive. The tradeoff is cost and a narrower format range; most dedicated units only handle 35mm film, so medium or large format shooters usually still need a flatbed.
Method 3: Scanning Negatives with a DSLR or Mirrorless Camera
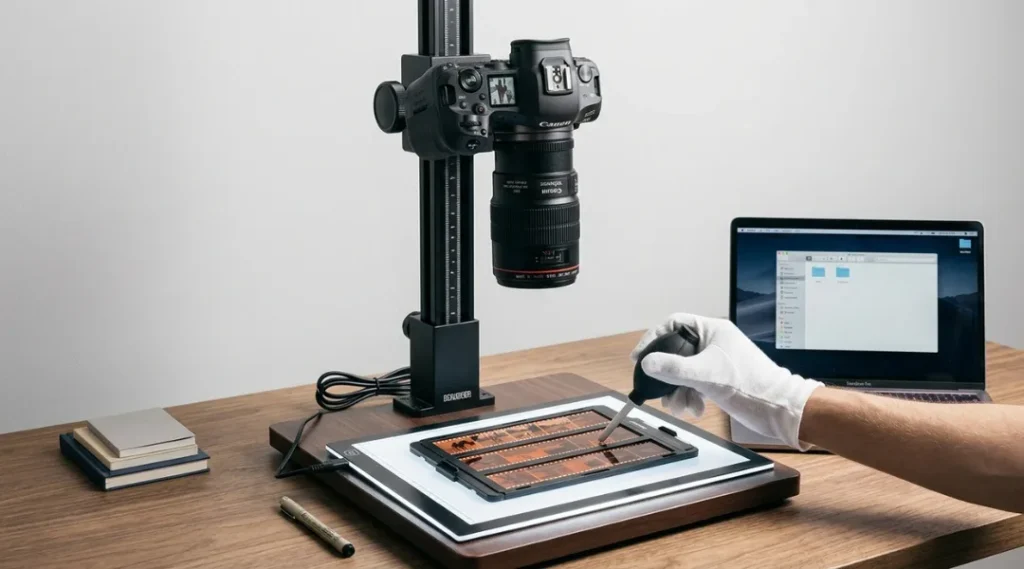
“Camera scanning” has become one of the fastest and highest-quality ways to digitize negatives, and it is a favorite technique in film photography communities for good reason: a modern camera sensor can out-resolve many consumer flatbed scanners in a fraction of the time.
What you need:
- A DSLR or mirrorless camera with a true macro lens (a 1:1 magnification lens is ideal)
- A light source such as an LED light pad or panel that produces even, flicker-free light
- A copy stand or tripod with a horizontal arm to hold the camera perfectly parallel to the film
- A negative holder to keep the film flat, since curled film ruins edge-to-edge sharpness
Step-by-step process:
- Mount the camera directly above the light pad, using a bubble level to make sure the sensor plane is parallel to the film.
- Place the negative in a holder on the light pad, emulsion side facing the lens.
- Set the camera to manual mode, a narrow aperture around f/8 for maximum sharpness, base ISO, and manual focus.
- Shoot in RAW format so you retain full flexibility when inverting colors later.
- Use an inversion tool or plugin (such as Negative Lab Pro for Lightroom) to convert the RAW negative into a positive image with accurate color.
This method is particularly efficient for bulk archives because a full roll of 36 exposures can often be captured in under ten minutes once the setup is dialed in.
Method 4: Scanning Negatives with Your Smartphone
For casual digitization or a quick backup, smartphone scanning apps offer a genuinely usable option, even though the results will not match a dedicated scanner or camera rig for archival-grade detail.
How it works:
- Place the negative on a bright, evenly lit surface, such as a light pad or a tablet screen showing a plain white image.
- Open a film scanning app that supports negative inversion, since most photo apps are designed for positive images only.
- Hold the phone directly parallel to the film, fill the frame as much as possible, and keep the phone steady to avoid blur.
- Let the app invert the colors and adjust white balance automatically, then fine-tune manually if needed.
- Export the final image at the highest resolution the app allows.
This approach works best as a quick preview method or for casual sharing rather than as your primary archival workflow.
Best Software for Scanning and Editing Negatives
Supporting keyword focus: film scanning software
- Manufacturer-bundled software (such as Epson Scan) is a solid starting point and includes hardware-level dust and scratch removal on supported scanners.
- VueScan and SilverFast are third-party alternatives favored for advanced color management, batch scanning, and support for older or discontinued scanner models.
- Negative Lab Pro is a popular Lightroom plugin specifically built for converting camera-scanned RAW negatives into accurate, film-like color positives.
- Adobe Photoshop or Lightroom remain the standard tools for final dust spotting, cropping, and tonal adjustments after the initial scan.
Common Mistakes to Avoid When Scanning Negatives
- Scanning at too low a resolution. Anything below 2400 dpi for 35mm film will limit how large you can print or crop the final image later.
- Skipping the cleaning step. Dust and hair show up starkly once backlit, and cleaning them out digitally afterward is far more time-consuming than a thirty-second brush-off beforehand.
- Ignoring emulsion orientation. Scanning a negative backward produces a mirrored image, a subtle error that is easy to miss until text or asymmetrical details look wrong.
- Saving only as JPEG. JPEG compression discards image data every time the file is resaved. Keep a TIFF or RAW master file and generate JPEGs from it as needed.
- Rushing the color inversion. Color negatives carry an orange base mask that must be neutralized correctly, or skin tones and skies will look off no matter how much you edit afterward.
How to Store Digitized Negatives Safely
Digitizing your negatives protects the images, but the digital files themselves also need a proper backup strategy. Preservation guidance from the Library of Congress recommends keeping at least two copies of important files on different storage media, stored in physically separate locations, and migrating them to current storage formats roughly every five years, since storage technology and file formats can become obsolete.
A simple, reliable approach:
- Keep a full-resolution TIFF or RAW master archive on an external hard drive.
- Maintain a second backup in cloud storage or a separate physical drive kept off-site.
- Store the original negatives in acid-free sleeves, away from direct sunlight and humidity, following Kodak Alaris’s storage and care recommendations for photographic materials.
How to Scan Negatives: Frequently Asked Questions
For most personal archiving, 2400 to 4800 dpi produces excellent detail without creating unmanageably large files. Go higher only if you plan large prints or heavy cropping.
Yes. A DSLR or smartphone paired with a backlight and an inversion tool can produce usable, and sometimes superior, digital copies without a traditional scanner.
Many photographers scan black and white film in color mode first, since it can capture subtle tonal information that a pure grayscale scan sometimes misses, then convert to black and white during editing.
With proper cold, dry storage, negatives can last many decades, but temperature and humidity swings accelerate fading and base deterioration, which is why early digitization is recommended for irreplaceable images.
Final Thoughts
Whether you choose a flatbed scanner, a dedicated film scanner, a DSLR rig, or a smartphone app, the most important step is simply starting before those negatives fade any further. Clean your film, pick the method that matches your volume and budget, and archive your masters properly, and you will end up with a digital collection that outlasts the originals by generations.